Autotask PSA Integration NEW!
The WithSecure™ Elements integration with Autotask PSA automatically forwards security activity from Elements into Autotask PSA as tickets. This lets MSPs manage WithSecure detections and notifications inside the same PSA tool they already use for service delivery, without manual ticket creation.
What this integration does
- Automated ticketing — WithSecure™ Elements creates tickets in Autotask PSA when there is relevant activity for a mapped customer.
- Per-customer routing — Tickets are routed to the correct Autotask PSA customer using the customer’s Autotask PSA reference ID.
- Queue selection — You choose the Autotask queue where WithSecure™ Elements tickets are created.
- Automated subscription provisioning — WithSecure™ products are synced to Autotask PSA, and subscriptions are provisioned automatically from a customer’s recurring service contract.
- Deep links back to Elements — Each ticket includes basic information about the Elements Security Center activity, along with a deep link to the full details in WithSecure.
- Native and multi-tenant — The integration is built into Elements, supports multiple customer tenants, and is configured entirely from the Elements Security Center.
Before you begin
You will need:
- An Autotask account with permissions to create API users.
- Access to the WithSecure™ Elements Security Center as a WithSecure Partner.
Step 1: Create an API user in Autotask
- Log in to the www.autotask.net management console.
- Click Admin in the navigation panel on the left-hand side.
- Under Admin categories, select Organization settings and users.
- Expand Resources/Users (HR) and click Resources/Users.
- From the New dropdown, select New API User.
- In the Add API user window:
- Fill in the mandatory general settings (names, email, etc.).
- Under Security Level, you can select API user (system) Can’t Read Costs — this is sufficient for the WithSecure™ Elements integration.
- In the Credentials section, click Generate key, then Generate secret.
- Copy the key and secret for use in the Elements Security Center.
- Under API Tracking Identifier, select the Integration vendor radio button.
- From the Integration vendor dropdown, select WithSecure.
- Click Save & Close at the top of the page.
To configure the integration you will need:
- API username/key
- API password/secret
Step 2: Configure the integration in Elements Security Center
In the WithSecure™ Elements Security Center, go to the Management > Integrations section and locate the Autotask PSA integration.
Click Configure integration on the Autotask component and complete the configuration.
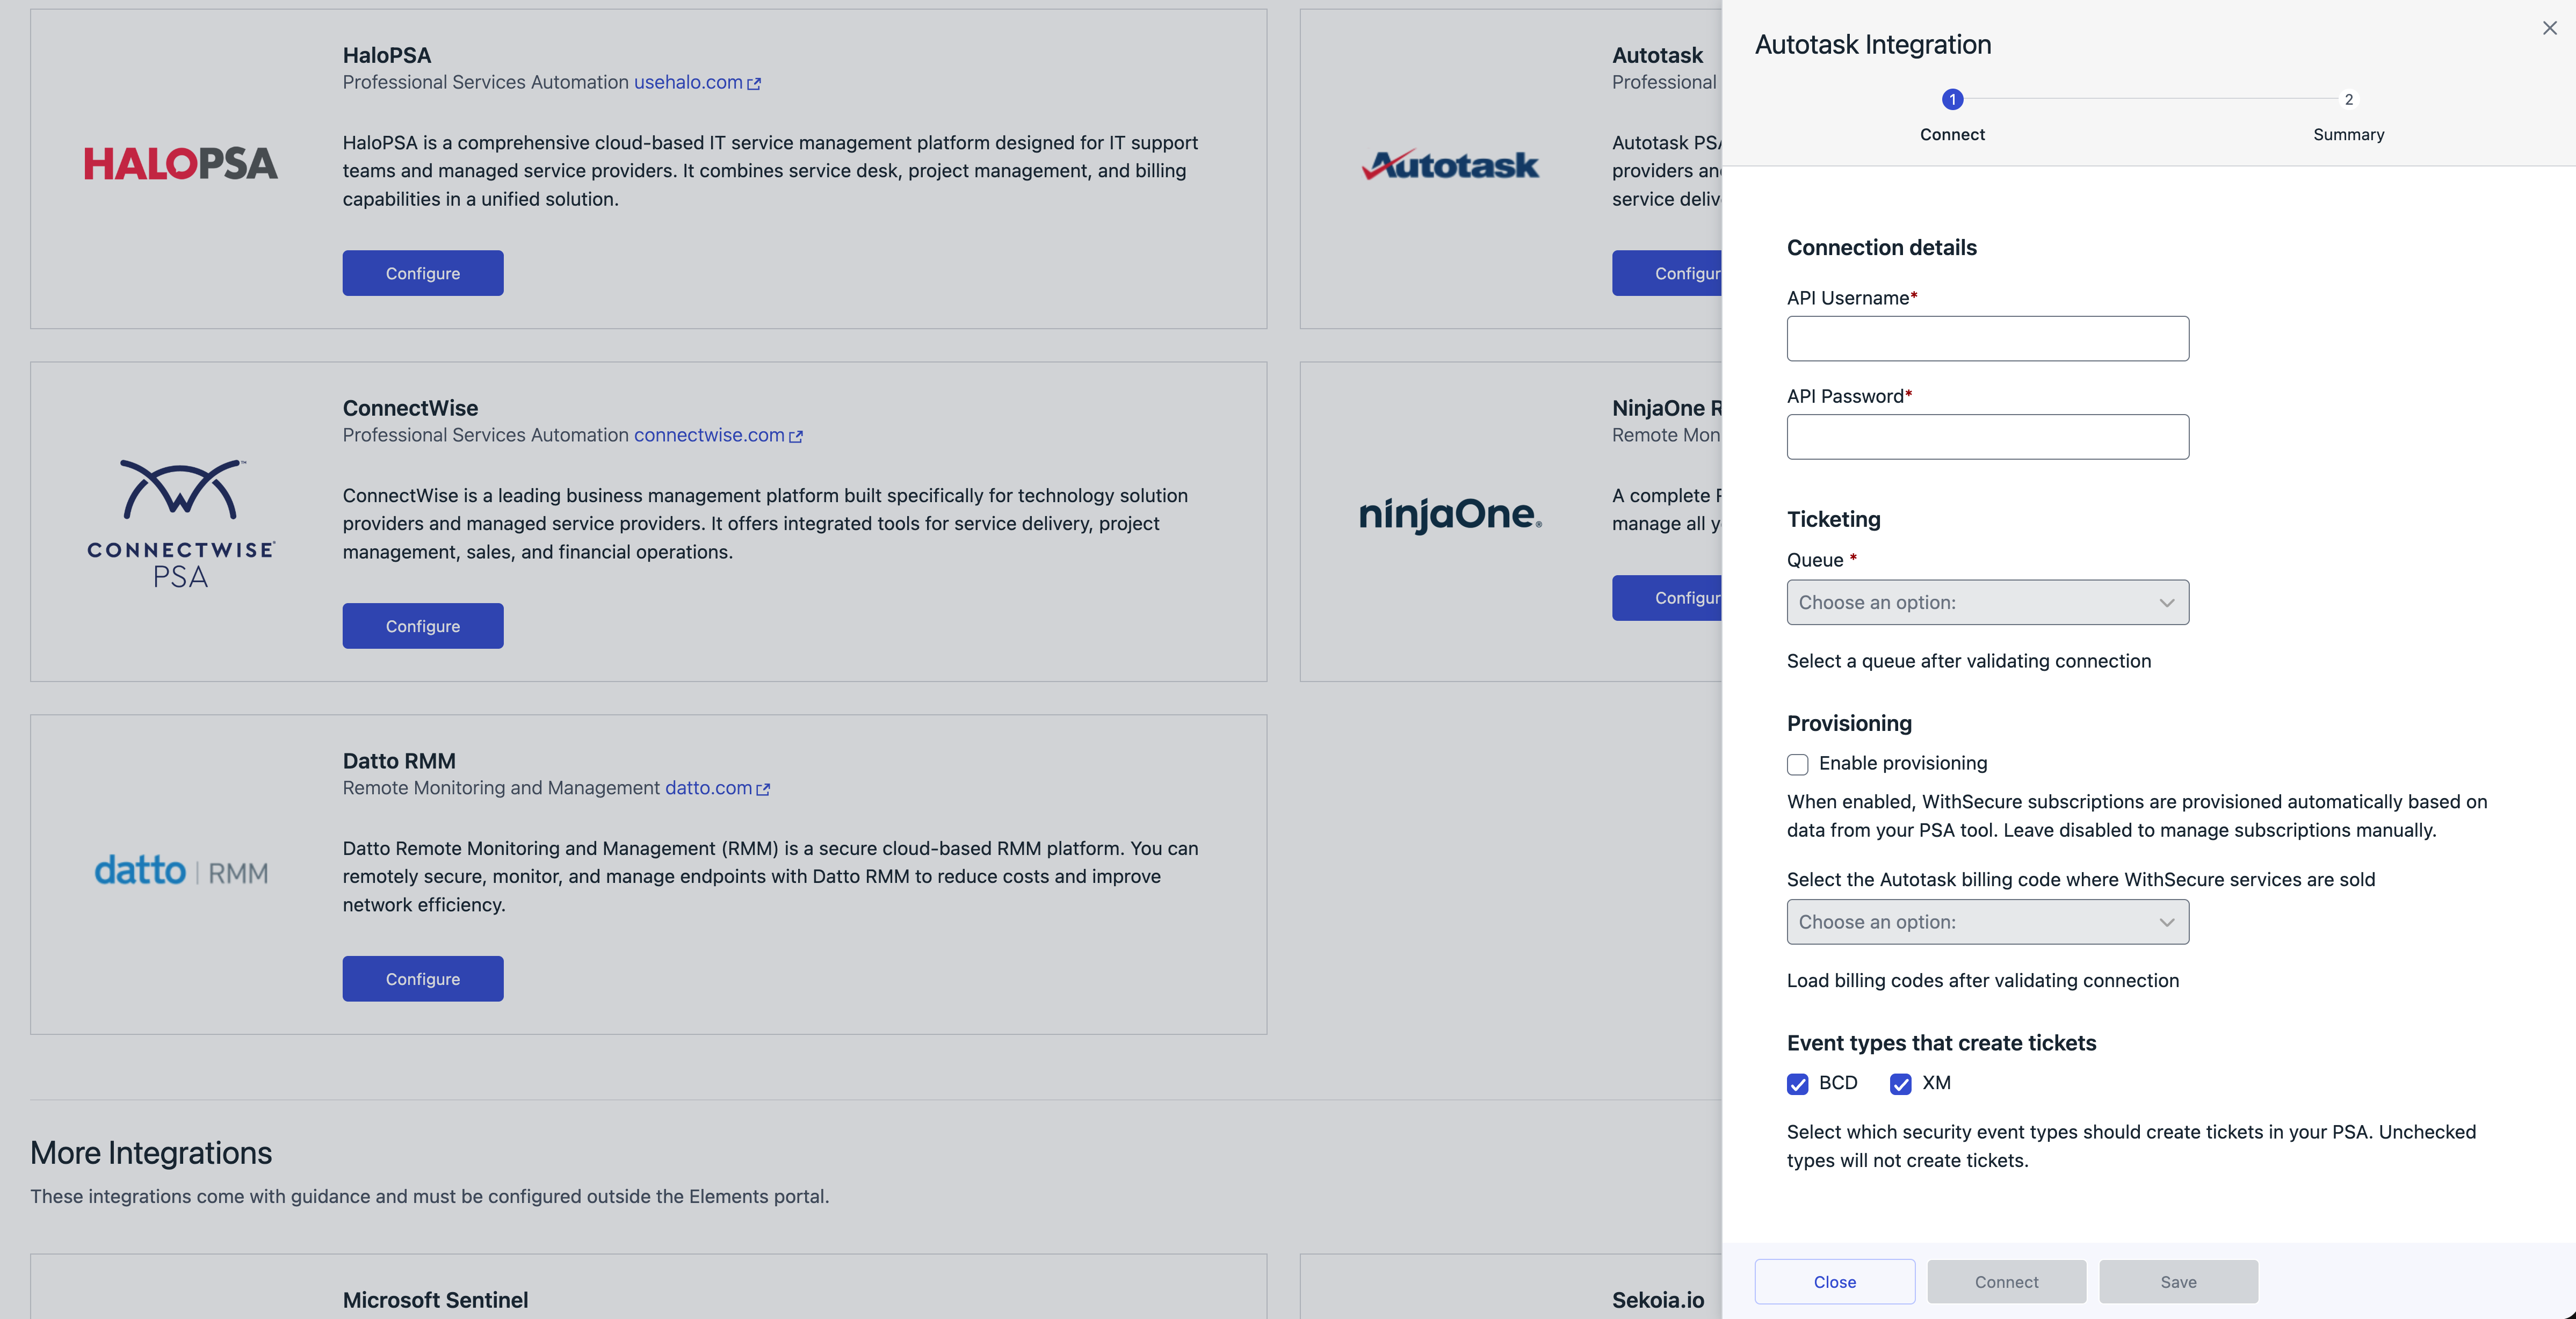
- Set the API username copied from the Autotask management console.
- Set the API password copied from the Autotask management console.
- Click Connect to validate connectivity and load the queue definitions from Autotask.
- Select the queue where WithSecure™ Elements should create tickets.
- Click Save.
Note: To enable automated WithSecure subscription provisioning, turn on Provisioning in the integration configuration and click Save. See Automated WithSecure subscription provisioning for how to use it.
Step 3: Enable ticketing for a customer
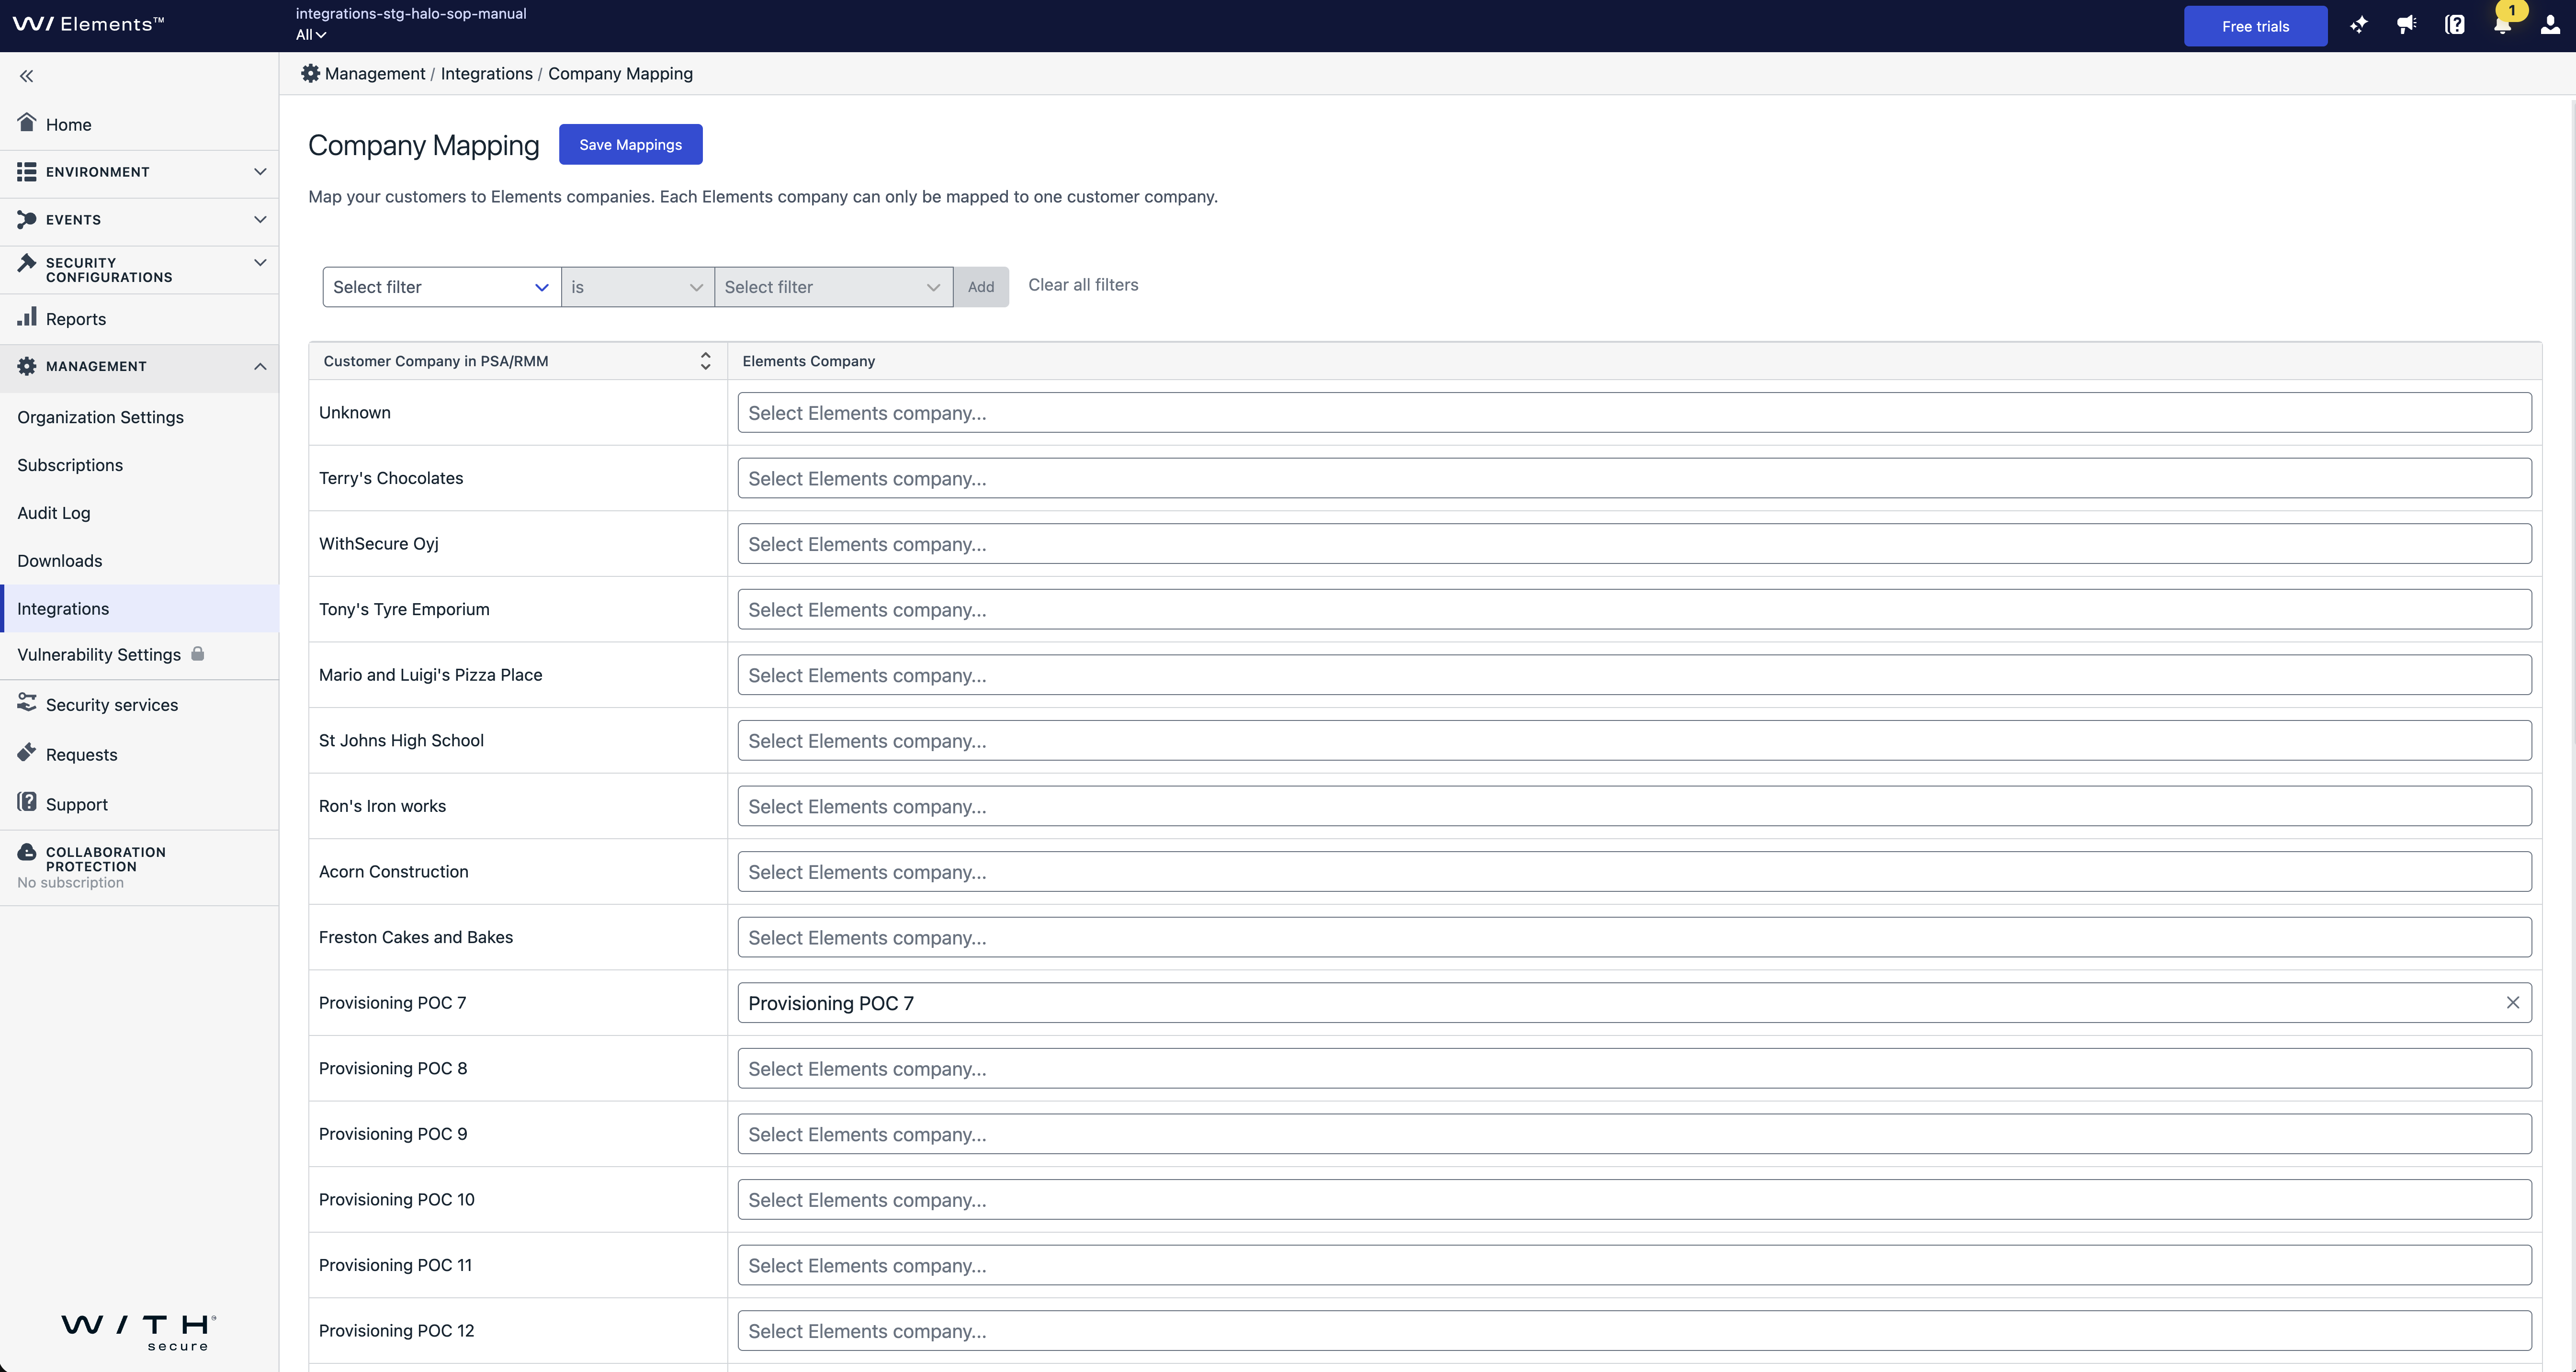
Map your Autotask PSA companies to the corresponding WithSecure™ Elements companies. Ticket creation starts automatically for each mapped company.
- In the company mapping view, match each Autotask PSA company to its WithSecure™ Elements company.
- Click Save Mappings.
Monitor tickets
Monitor the tickets you configured the integration to create in Autotask PSA. Each ticket contains basic information about the Elements Security Center activity and a deep link to the full details in WithSecure.
Automated WithSecure subscription provisioning
When Provisioning is enabled in the integration configuration, the integration provisions WithSecure™ subscriptions for your customers directly from recurring service contracts in Autotask PSA. You no longer need to create subscriptions manually in the WithSecure partner portal.
How it works
Once Provisioning is enabled in the integration configuration, the integration automatically syncs the available WithSecure™ products to the Autotask PSA tenant of the partner. These products become available in Autotask PSA so you can add them to a customer’s recurring service contract. When a recurring service contract that includes a WithSecure™ product is enabled for a customer, the integration provisions the corresponding subscription for that customer automatically.
Note: If the customer’s organization does not yet exist under your partner account in WithSecure, the integration creates it automatically as part of provisioning.
Prerequisites: required organization details
Before a subscription can be provisioned automatically, the organization in Autotask PSA must meet the following requirements:
- The organization must have Address, City, Zip Code, and Country defined.
- The organization must have at least one contact.
To add a contact, open the organization details and click Contacts from the navigation on the left-hand side, then add a new contact. The contact must have at least First Name, Last Name, and Email Address defined. This is the billing contact for the organization, and its details are sent to WithSecure as the account’s contact information.
Provision a subscription with a recurring service contract
To provision a WithSecure™ subscription for a customer, add a recurring service contract in Autotask PSA:
Open the organization’s details and click Edit.
Click the three-dot menu to find Contracts, and click it.
Click New, then select Recurring Service Contract.
Note: The organization must be of type Customer for it to be possible to add contracts to it.
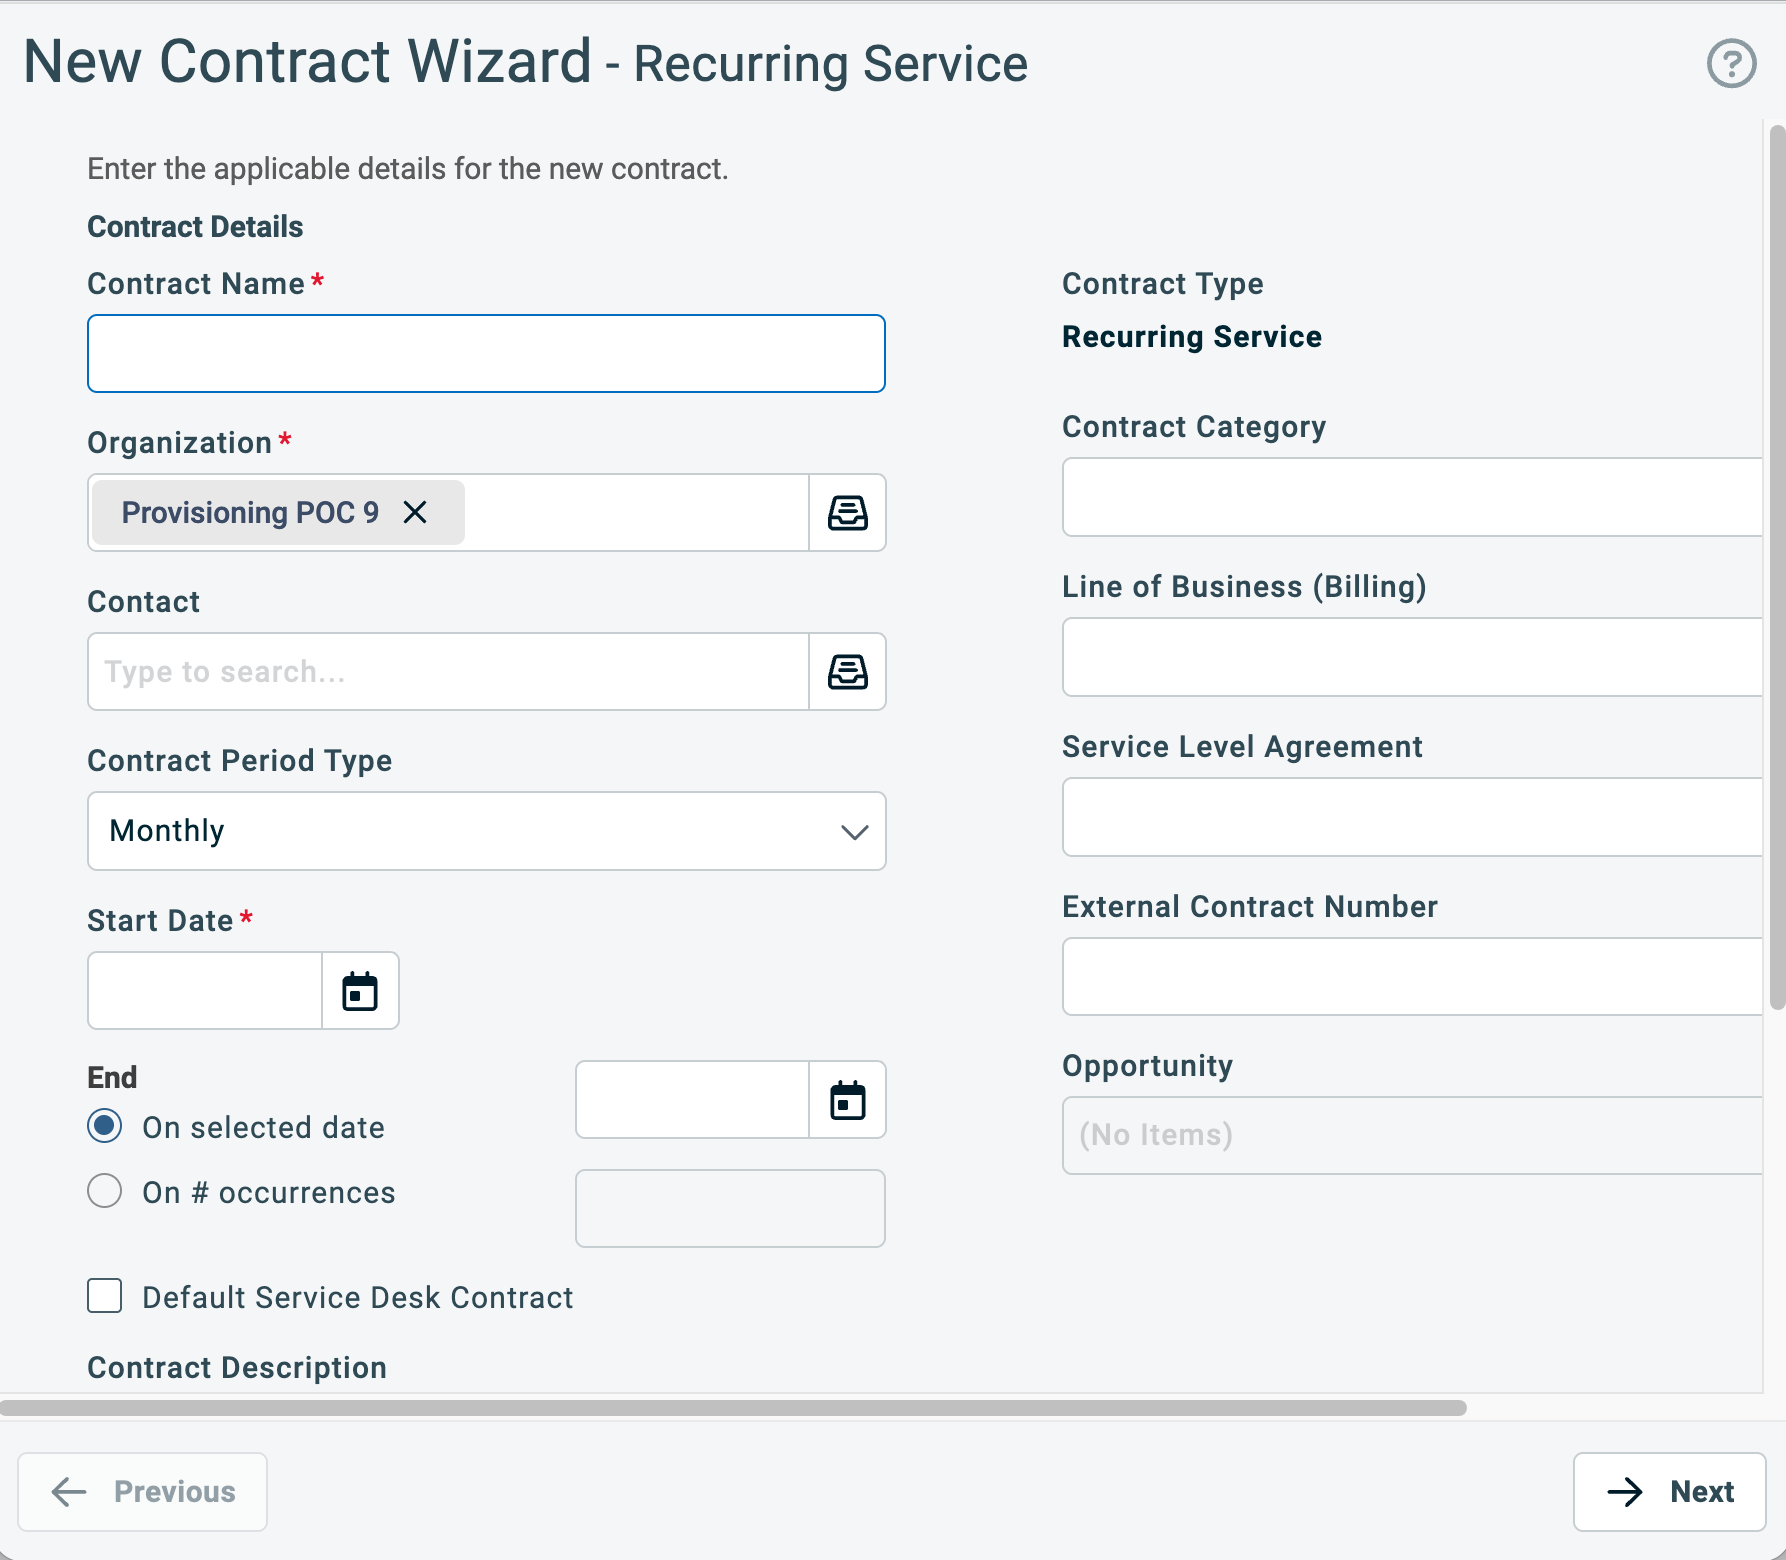
- Set the Contract Name as you prefer. Set the Start Date to today or to a later date, and set the End date as you prefer.
- Click Next.

- Fill in the revenue and billing information fields as preferred.
- Click Next.
- Click Add Services/Bundles, find one or more WithSecure™ products, and select the products you want to provision for this customer.
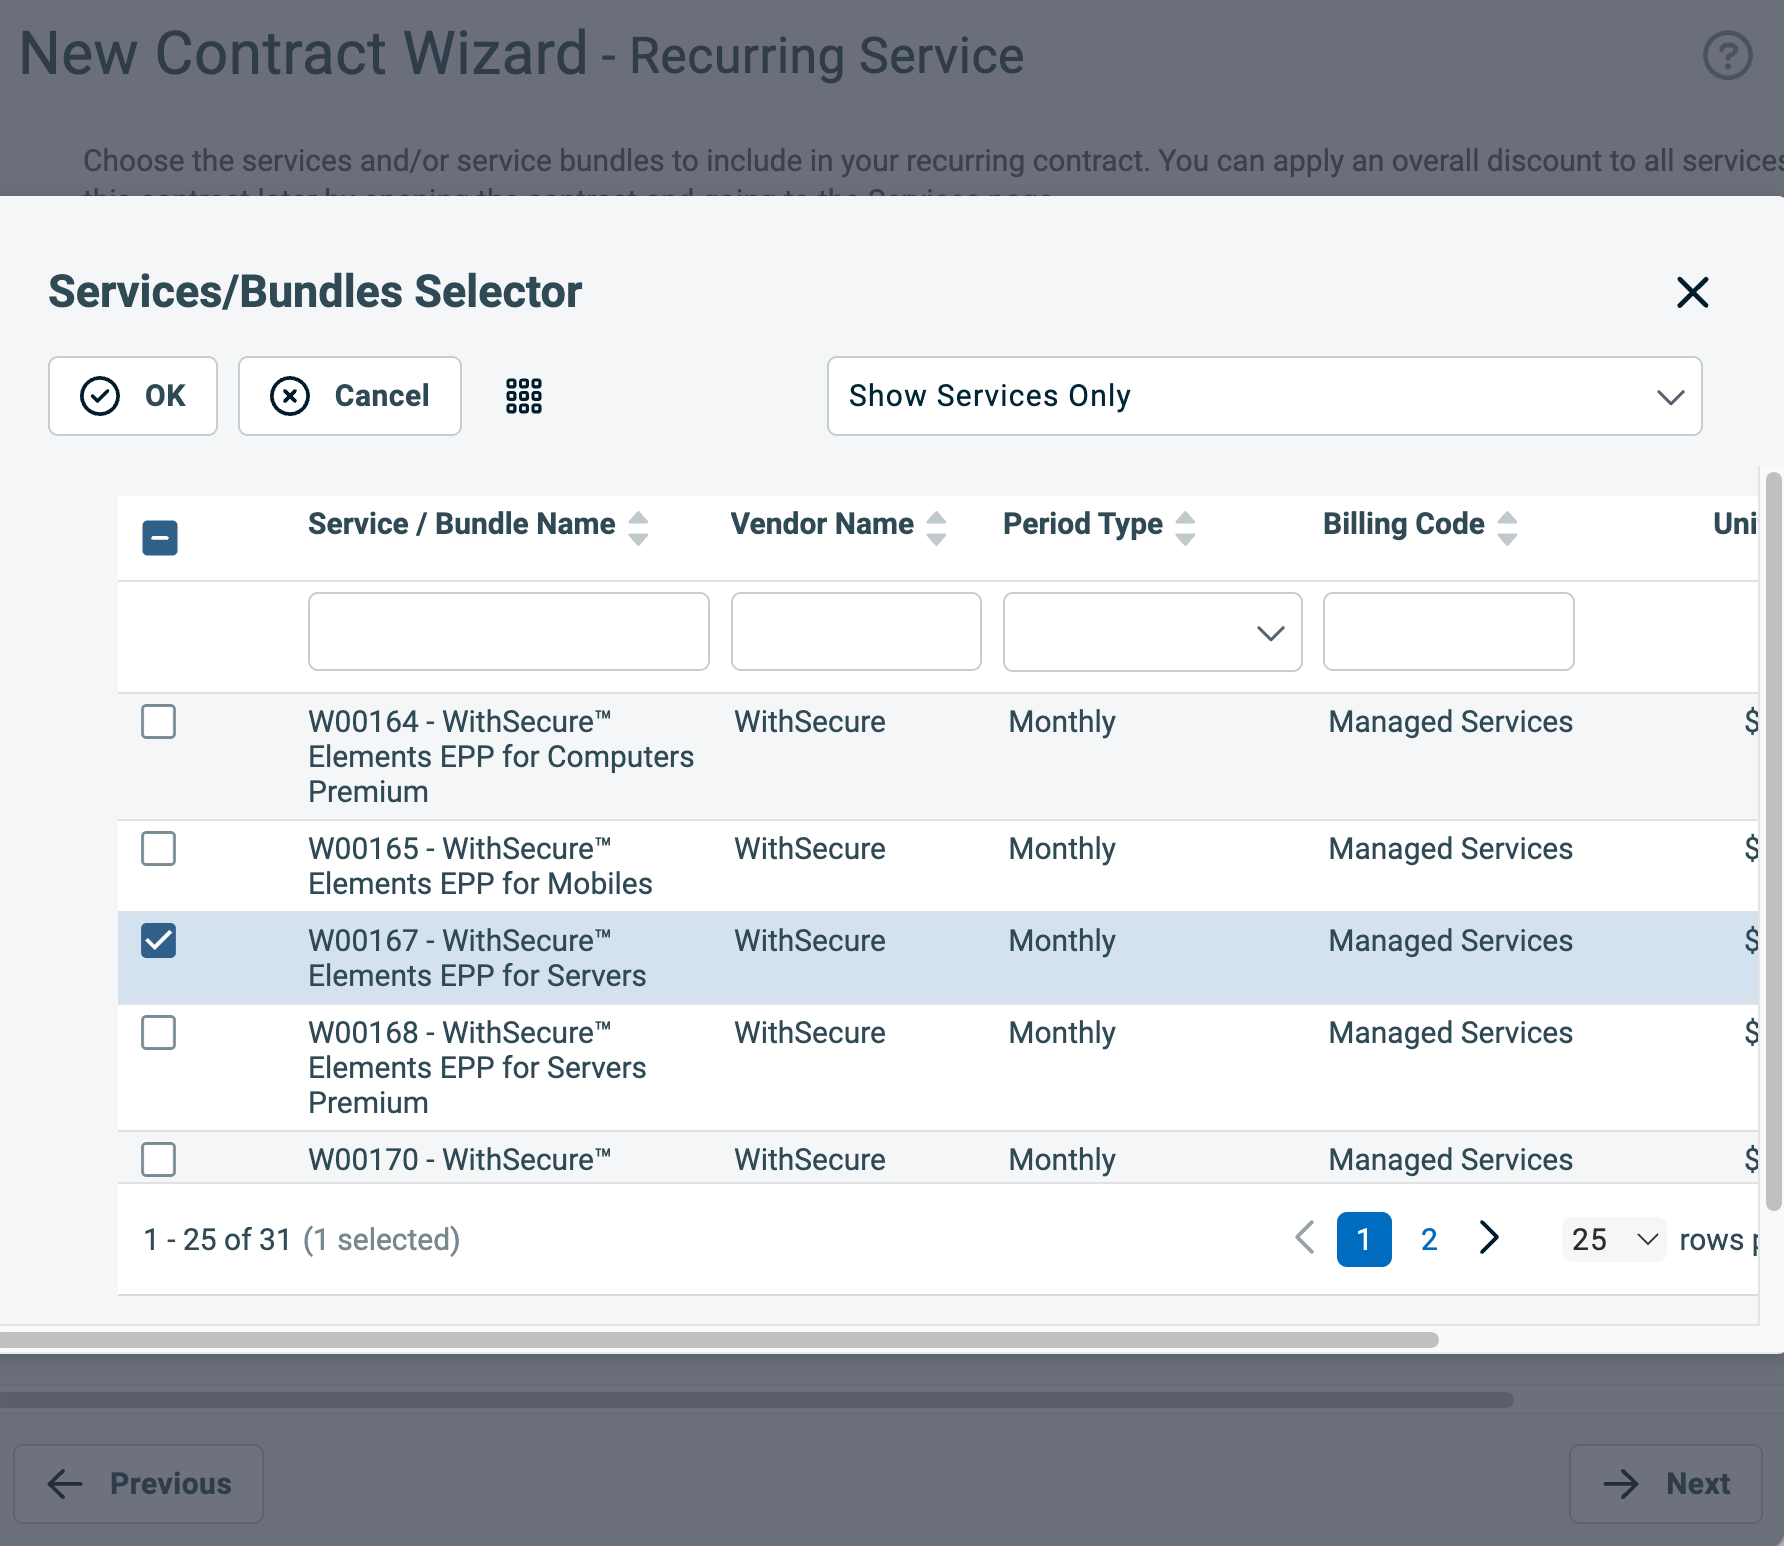
- Click OK.
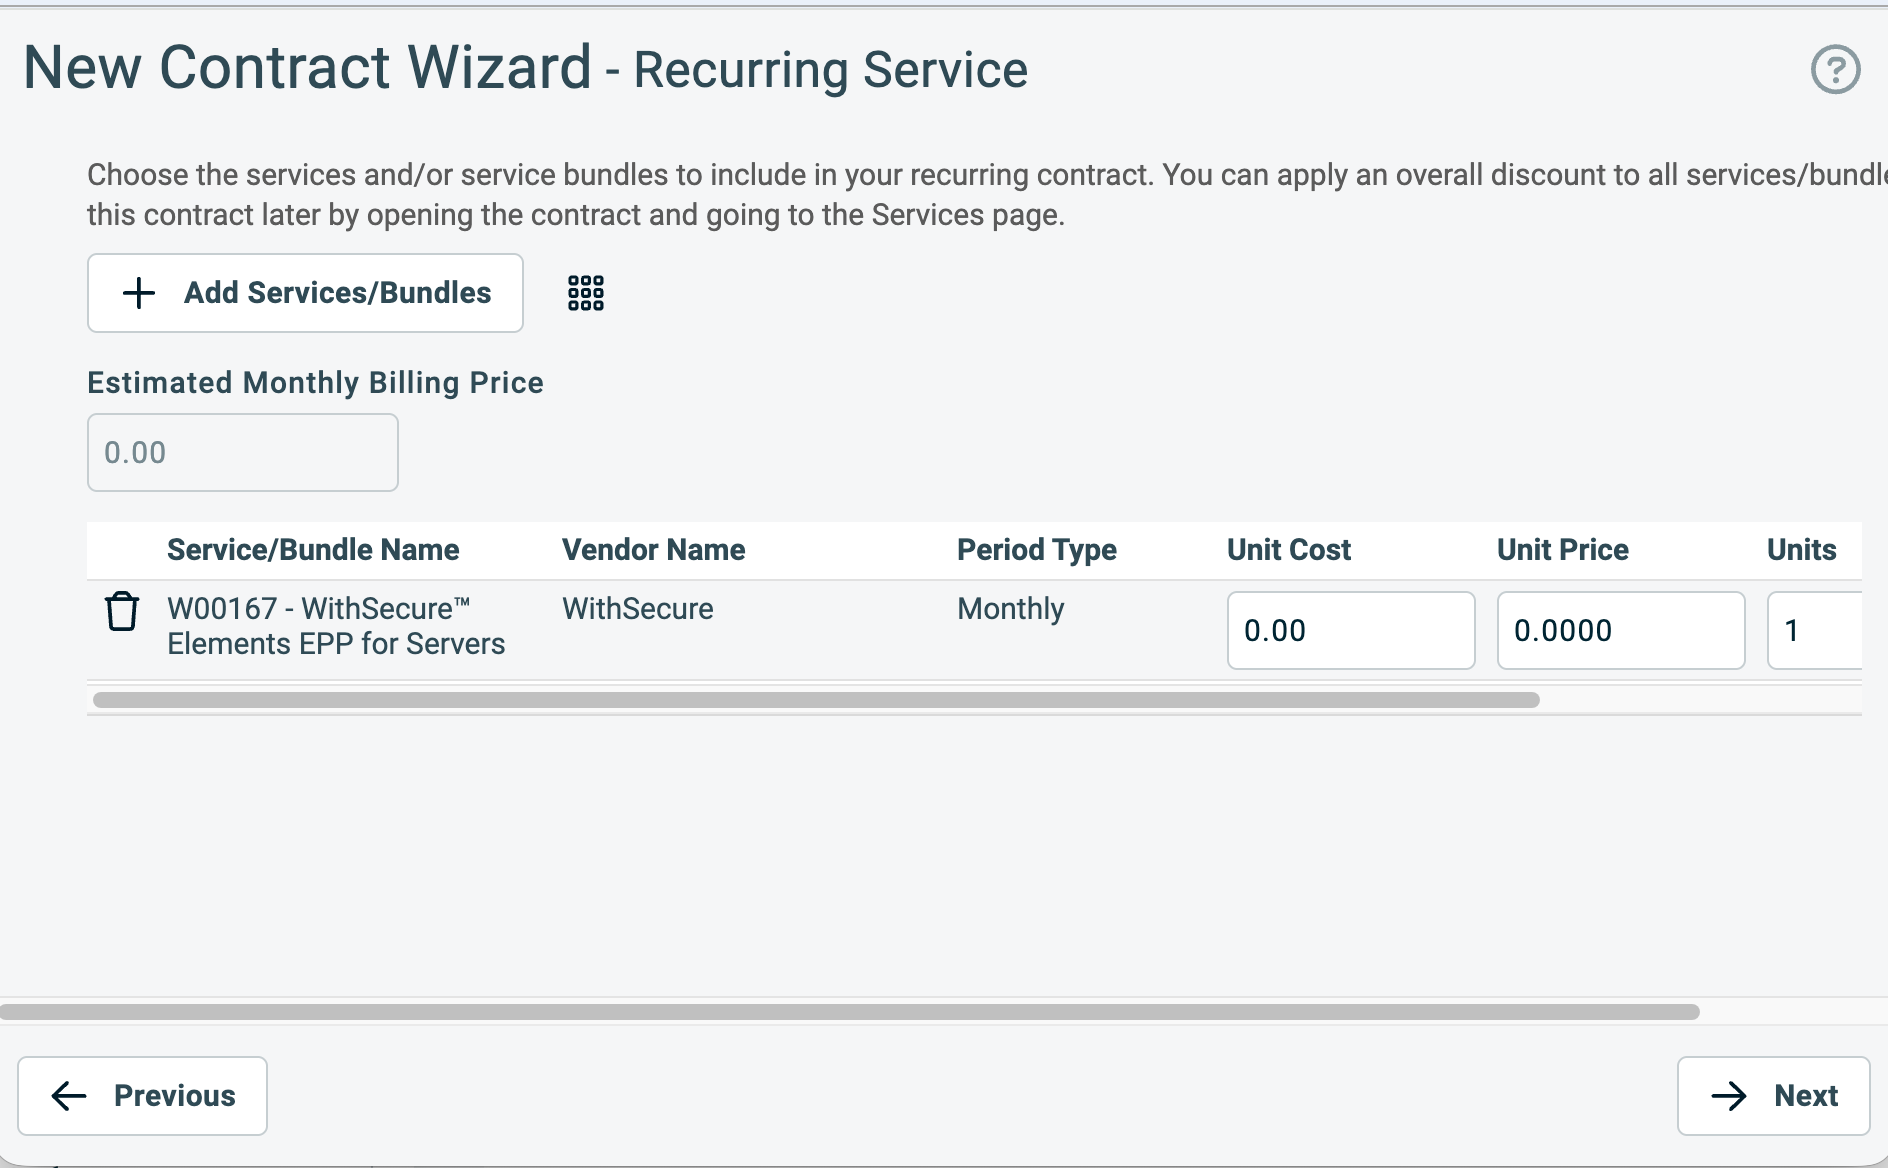
Set the Units for each WithSecure™ service. This works the same way as the quantity on a Halo PSA recurring invoice: the units determine the maximum number of seats available for the WithSecure™ subscription, so make sure they match the number of seats the customer needs. You can change this later from the contract if needed.
Note: You can set the Unit Price to whatever you want. This is the price the MSP bills their customer and has no effect on the WithSecure™ subscription itself.
Click Next.
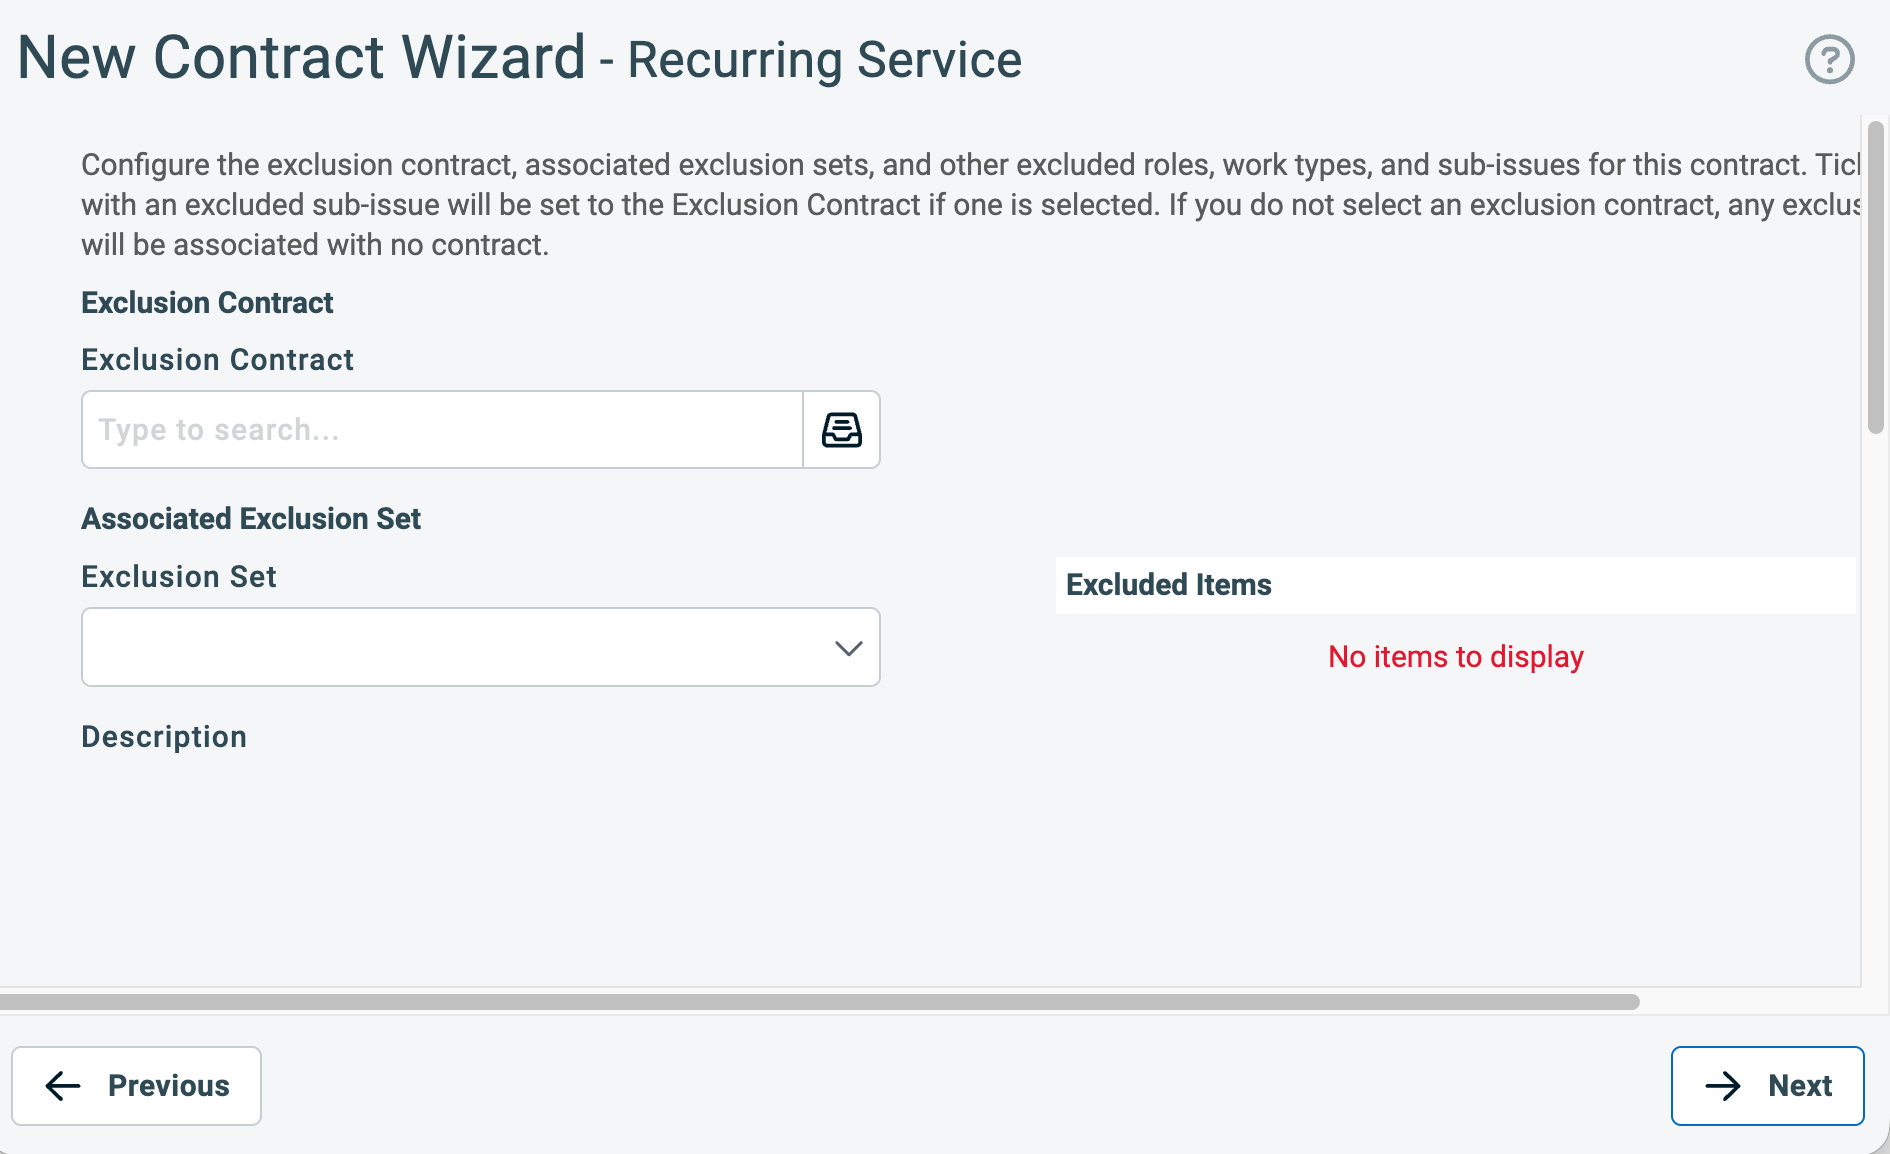
- Fill in the exclusion contract fields as preferred.
- Click Next.
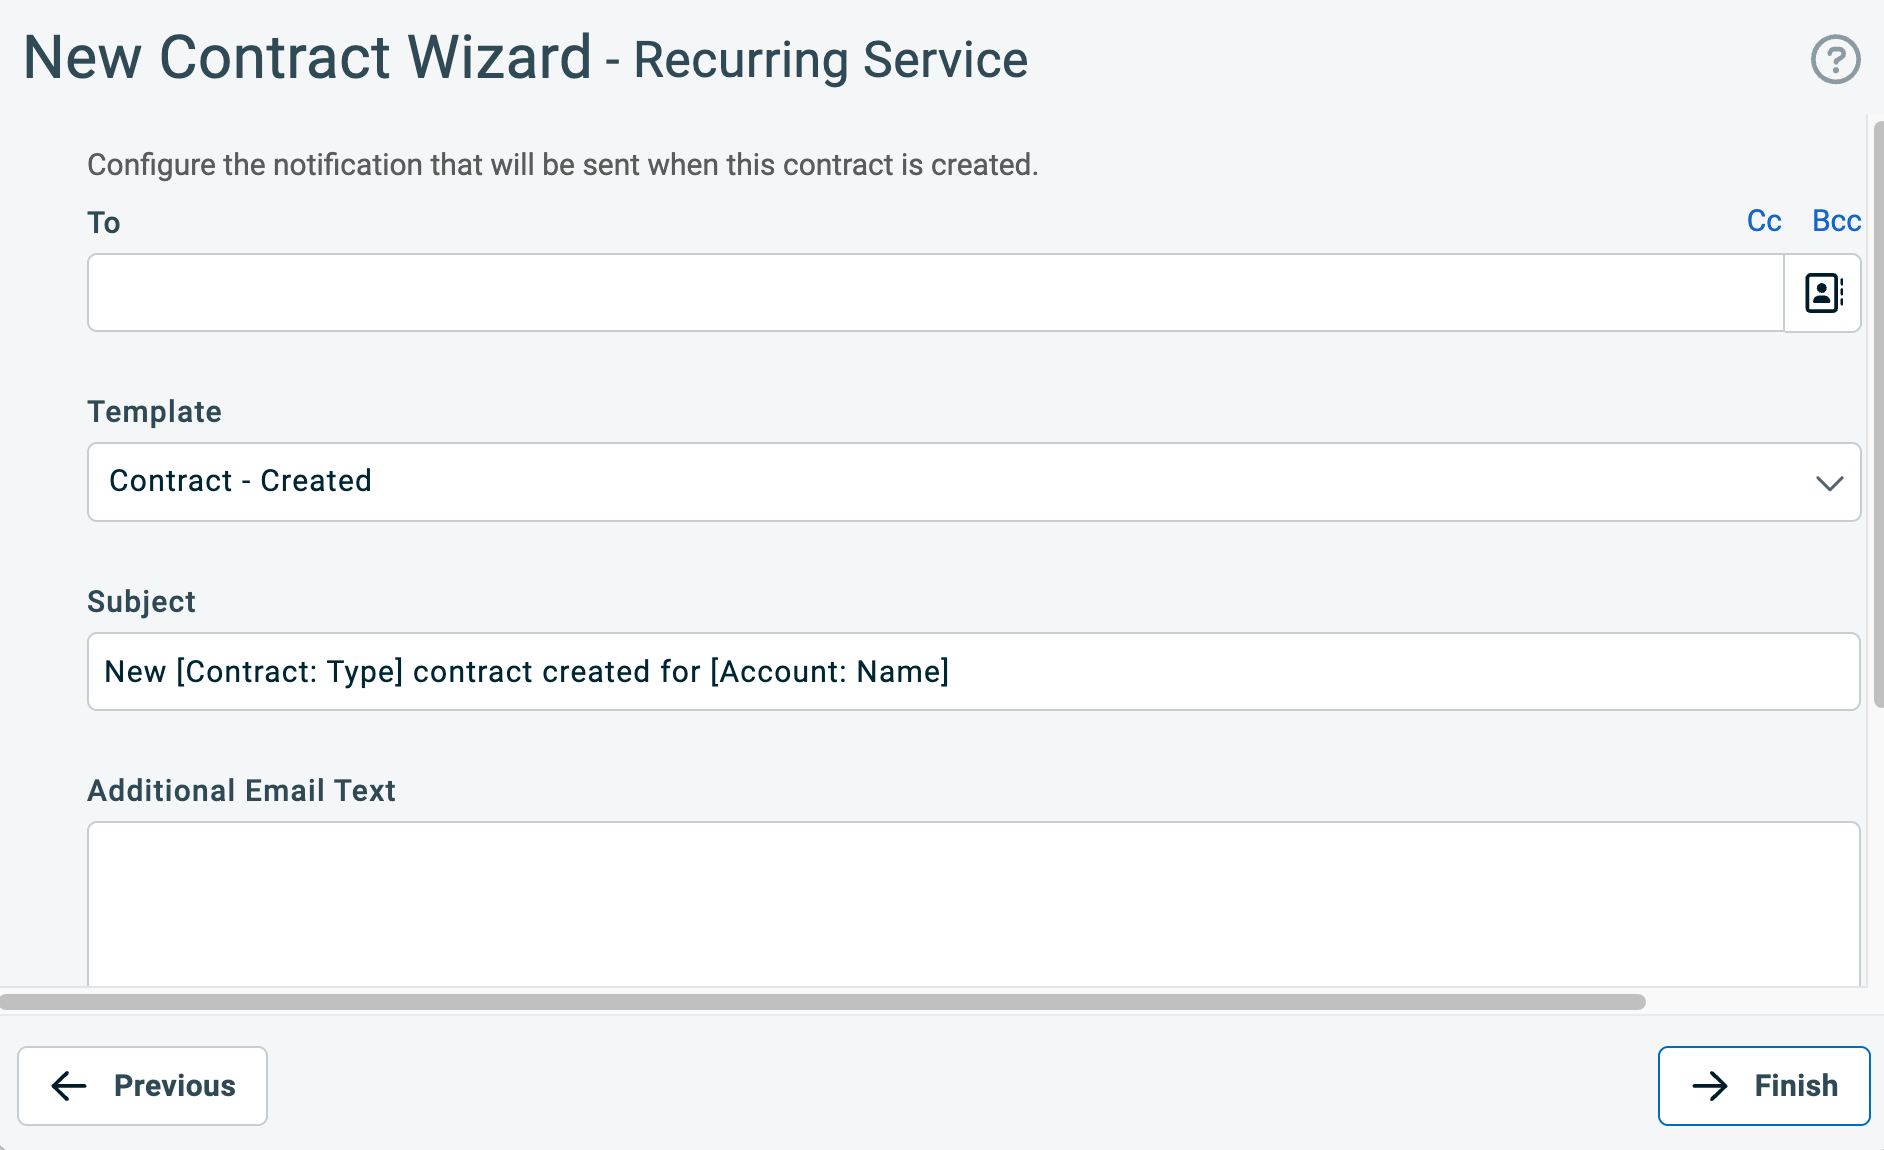
- Fill in the notification fields as preferred.
- Click Finish, then click Close.
If the organization’s billing contact details are correctly set, Elements will automatically provision the new organization/subscription within 15 minutes. To change the number of seats later, update the units on the recurring service contract.
Tip: To provision the subscription immediately instead of waiting, go to Management > Integrations in the Elements Security Center, open the active Autotask PSA integration, and click Sync sites.
Troubleshooting
If tickets are not created as expected, review the integration logs in the Elements Security Center:
- Go to the Management > Integrations section.
- Open the active Autotask PSA integration.
- Select Logs to review recent integration activity and error details.
If a subscription is not provisioned after enabling a recurring service contract, review the integration logs to check for any missing organization details required for provisioning. After completing the missing details for the organization in Autotask PSA, you can manually trigger provisioning by going to Management > Integrations in the Elements Security Center, opening the active Autotask PSA integration, and clicking Sync sites. Then, review the integration logs again—please note that processing may take up to 1 minute.
Availability
This integration is available to WithSecure Partners in the Elements Security Center. It is not available for free trials or company-managed subscriptions. To access dedicated partner features, contact WithSecure.